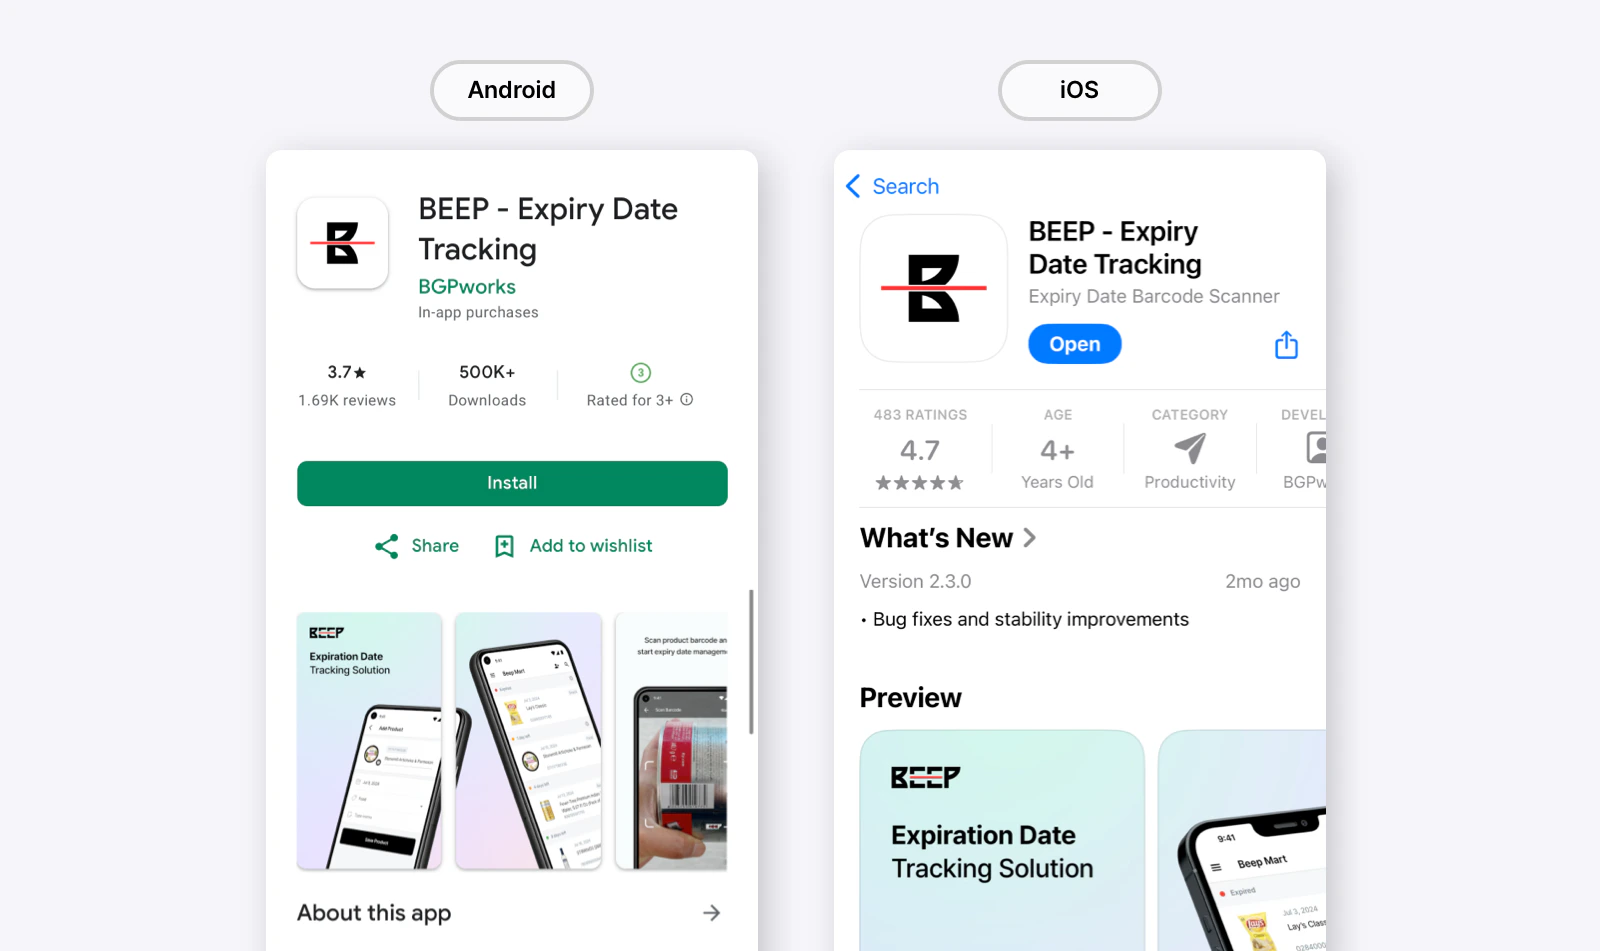
Download the App
BEEP is available on both iOS and Android:- iOS: Download from App Store
- Android: Download from Google Play
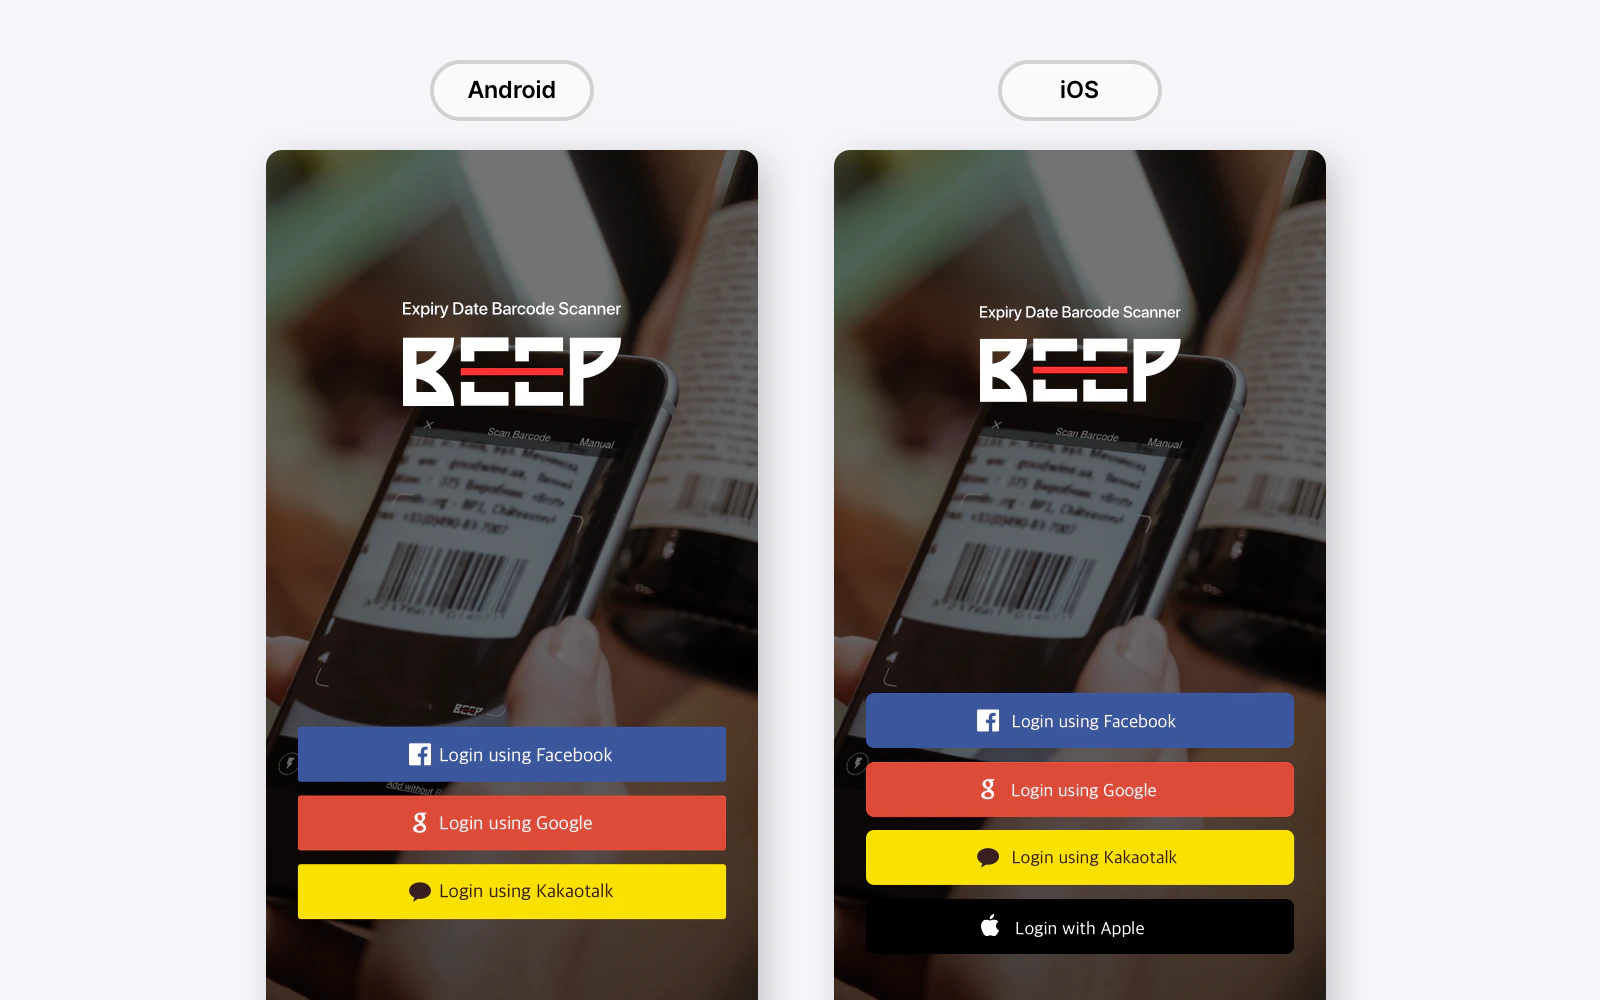
Login
Sign-up is not required. You can log in using any of the following options:- KakaoTalk
- Apple (on iOS devices)
Manage Products with BEEP
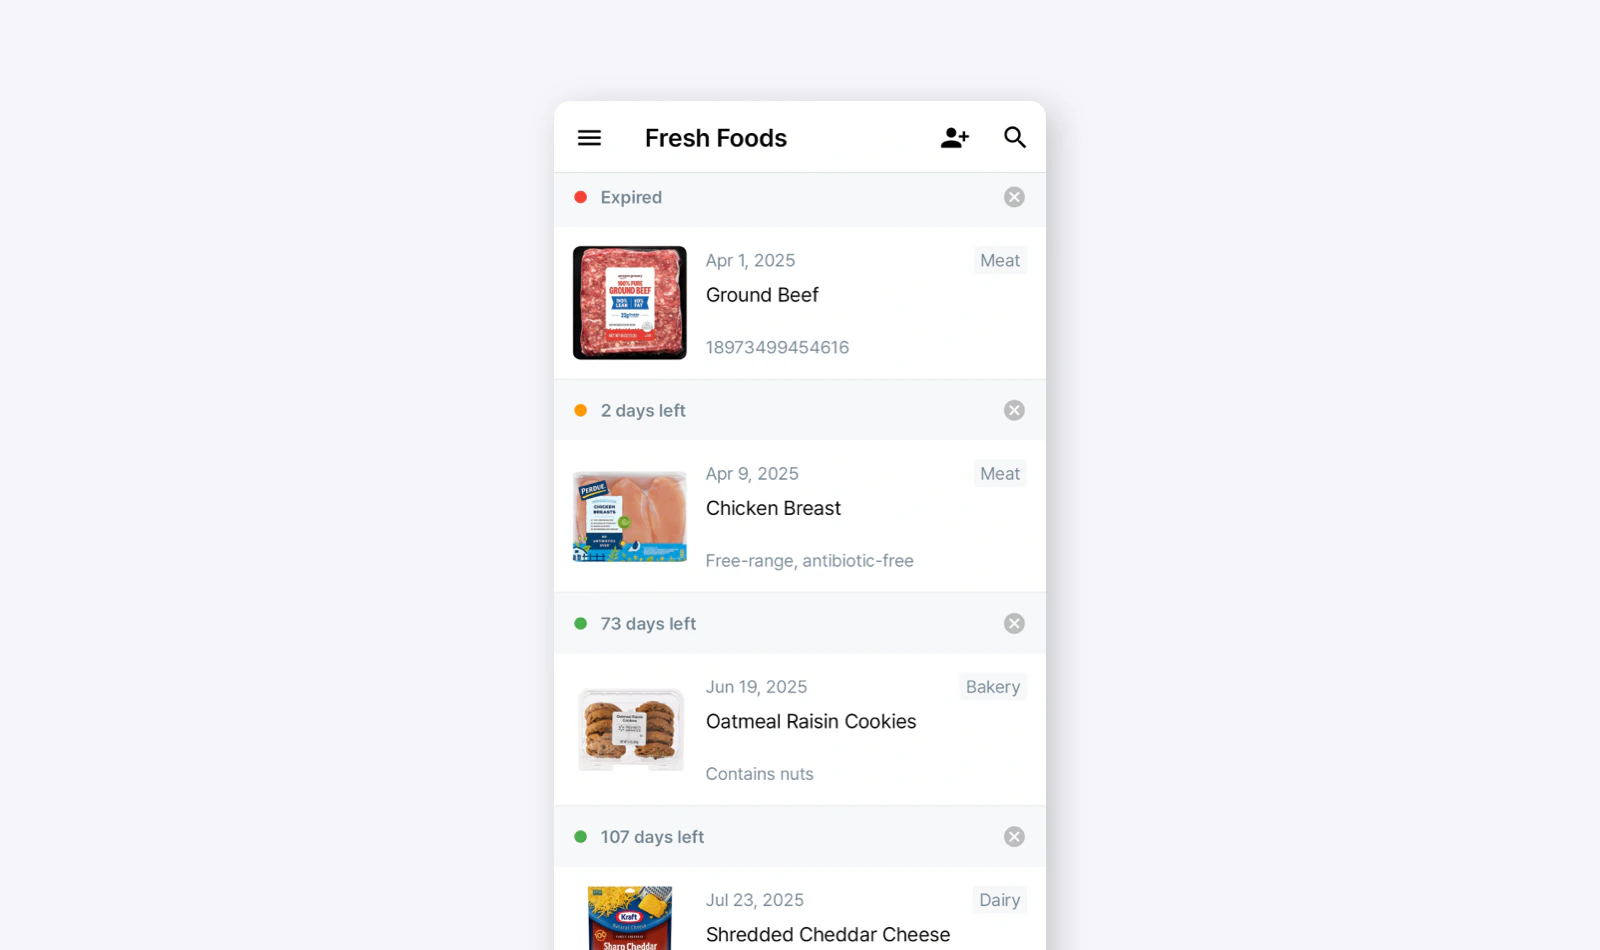
Add Products
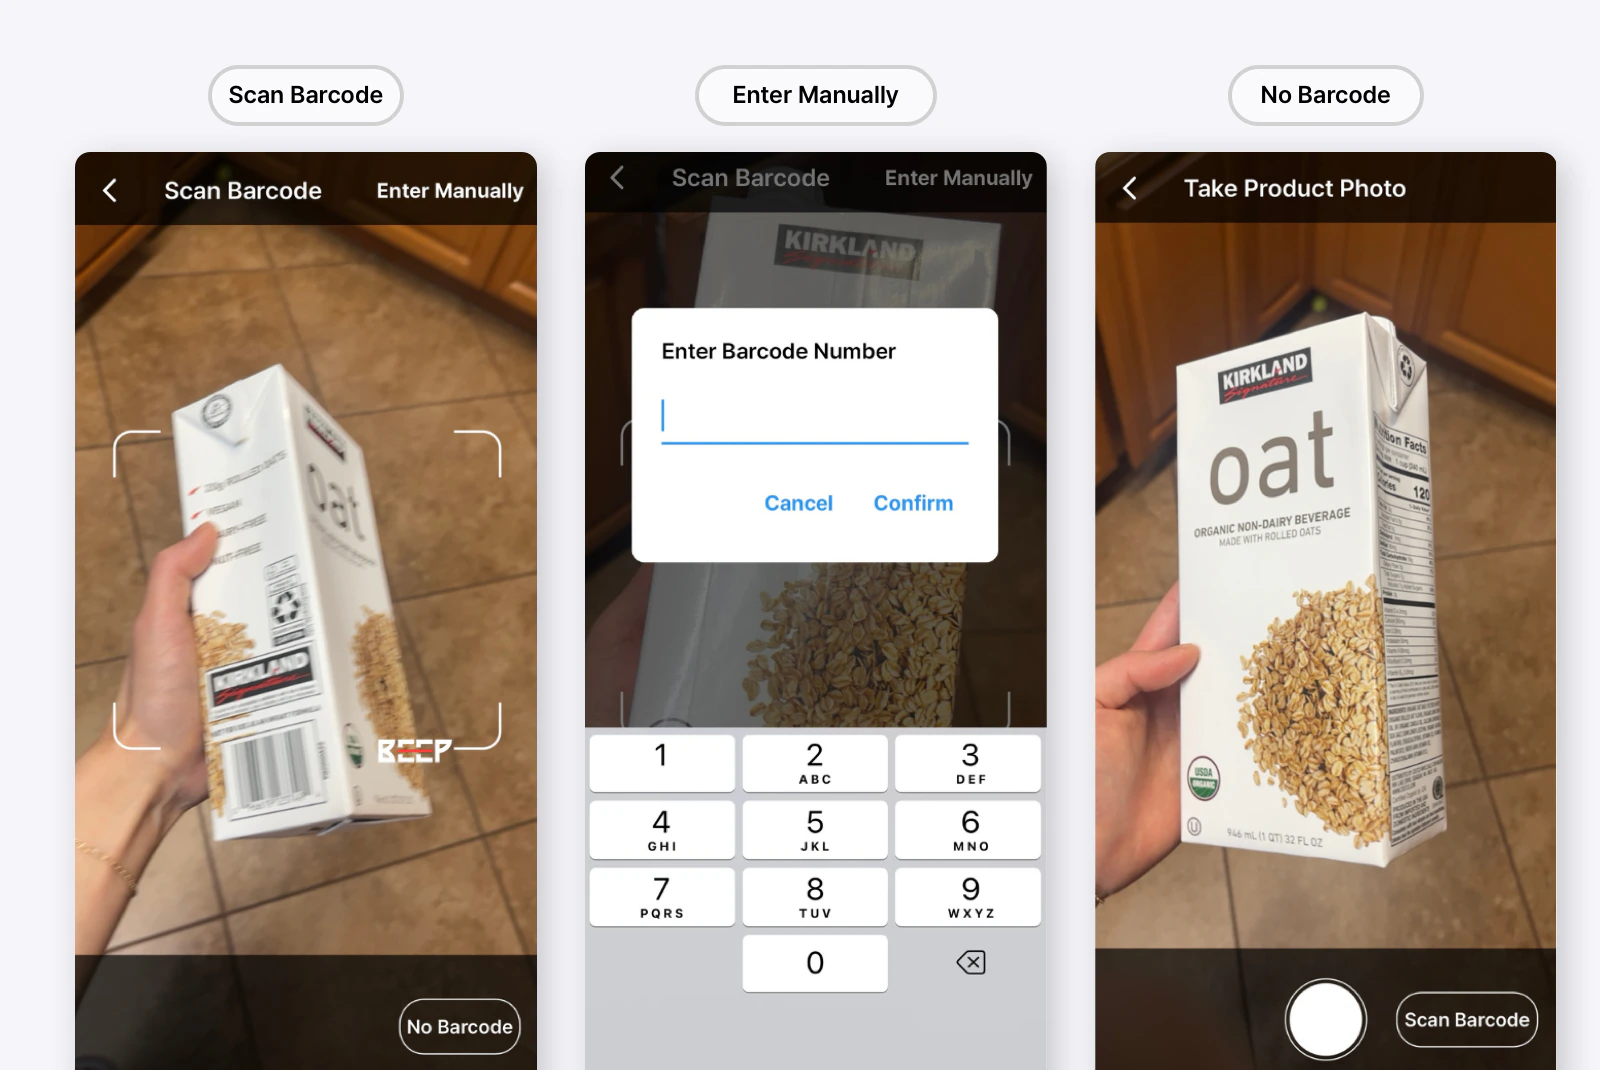
To add a product, scan its barcode using your smartphone camera. The app will automatically capture the product’s image and name. Alternatively, you can enter the barcode number manually or add the product by uploading its image.- Scan Barcode: Point your smartphone camera at the barcode to
Scan Barcode. When the scan is successful, the product details will be auto-filled in BEEP. - Enter Barcode Manually: If the barcode isn’t recognized, select
Enter Manuallyand type in the barcode number. - Add Without a Barcode: If your product doesn’t have a barcode, select
No Barcodeand take a photo of the product.
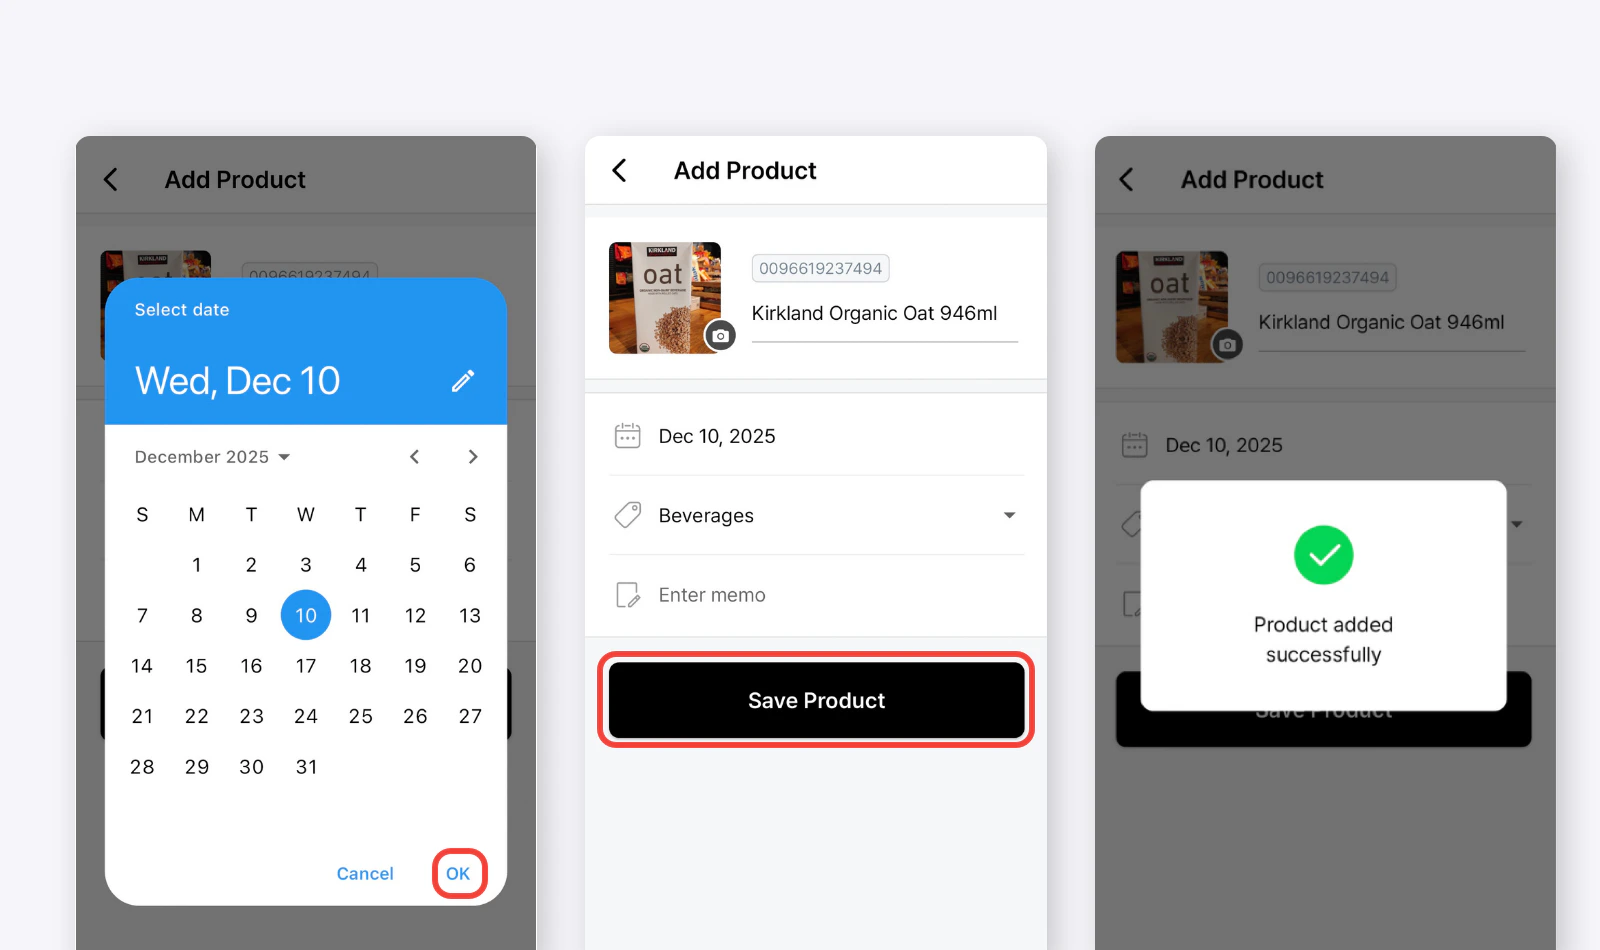
Product Details
Once the product is added, enter the expiration date. If the product name or image isn’t available, you can add them manually. Categorize the product and include any notes in the memo field if needed.- Add product name and image (if not auto-filled)
- Select a category
- Enter the expiration date
- Add any relevant notes/memos (optional)
Settings
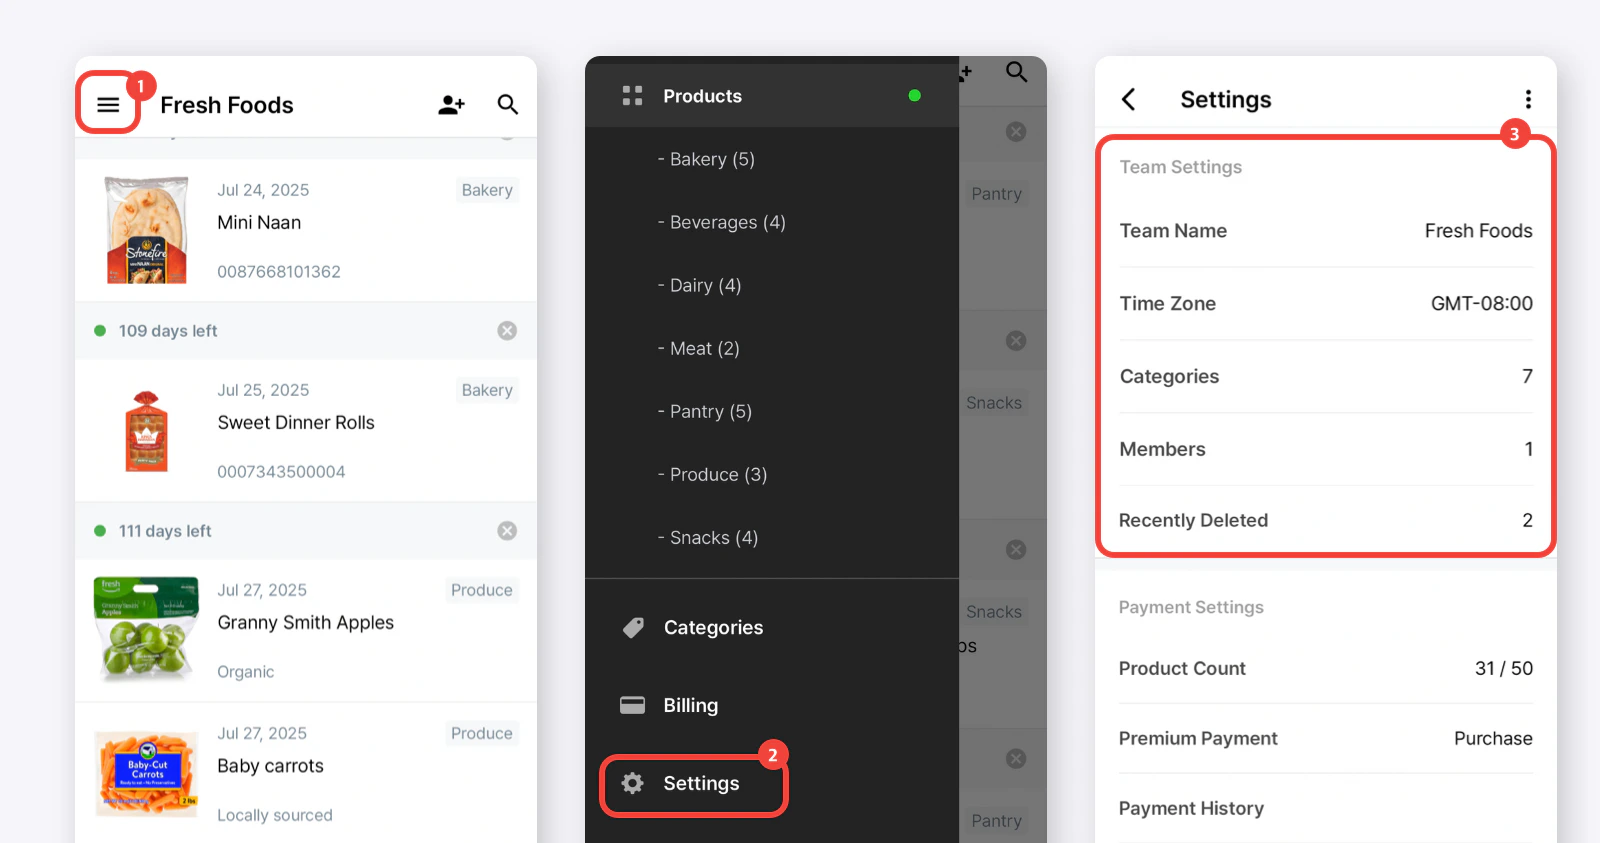
Team Settings
When you sign up for BEEP, a default team is created for you. A “team” is a shared workspace where you and your members can track product expiration dates together. The default team name will be randomly assigned (e.g., “Courageous Lion”), but we recommend renaming it to better identify and differentiate your stores.How to Access Team Settings
Go toMain Menu (≡) > Settings > Team Settings.
- Team Name
- Time Zone
- Categories: The total number of categories in your team for organizing products.
- Members: The number of members currently in your team.
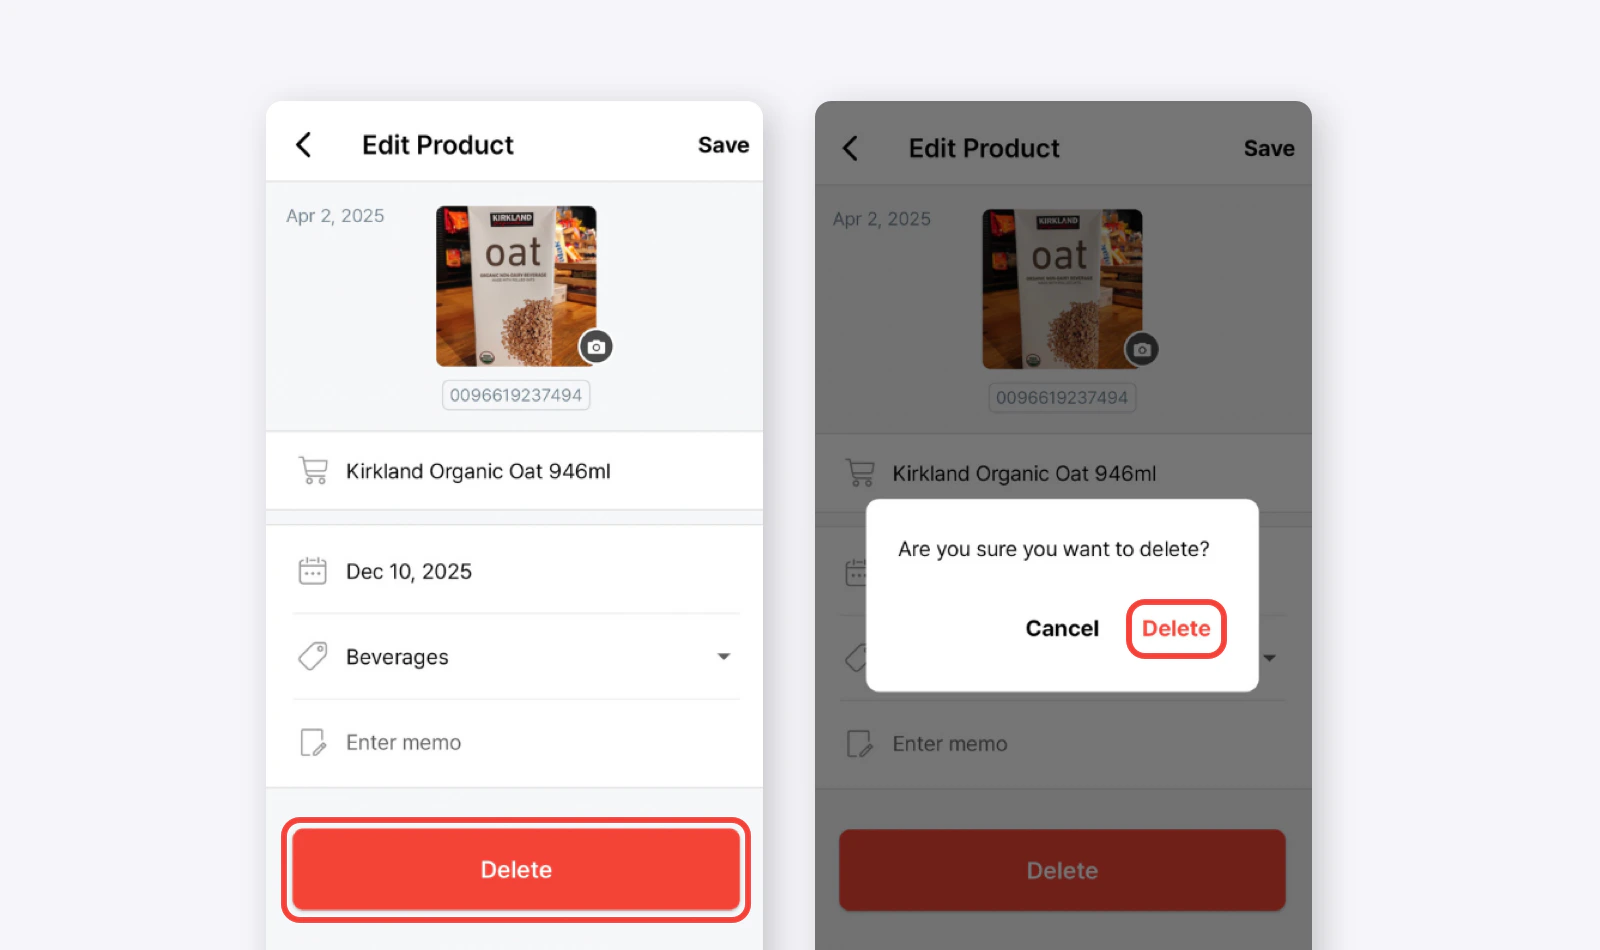
- Recently Deleted: View products that were recently deleted from your team. You can see details of who deleted the item and when it was deleted. Deleted products can also be restored at any time if needed.
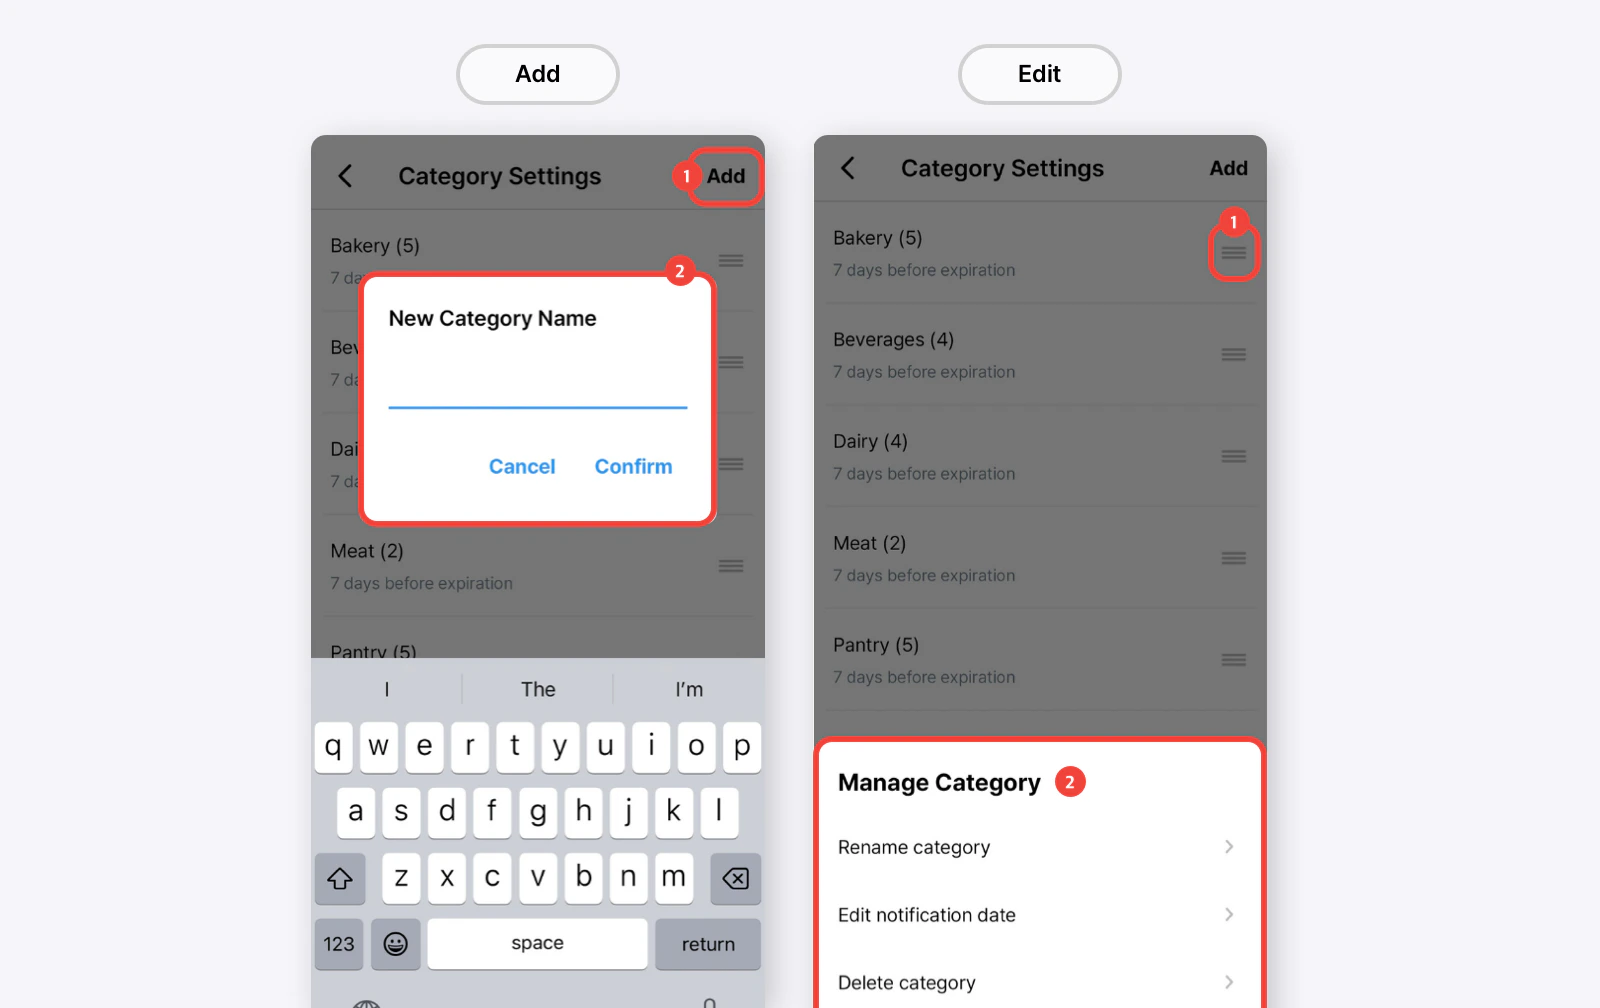
Category Settings
Within your team, you can create and manage categories to organize your products. The default category is “Uncategorized,” but you can add and edit categories to keep everything structured.How to Access Category Settings
- Go to
Main Menu (≡)>Categories.
- Go to
Settings>Team Settings>Categories.
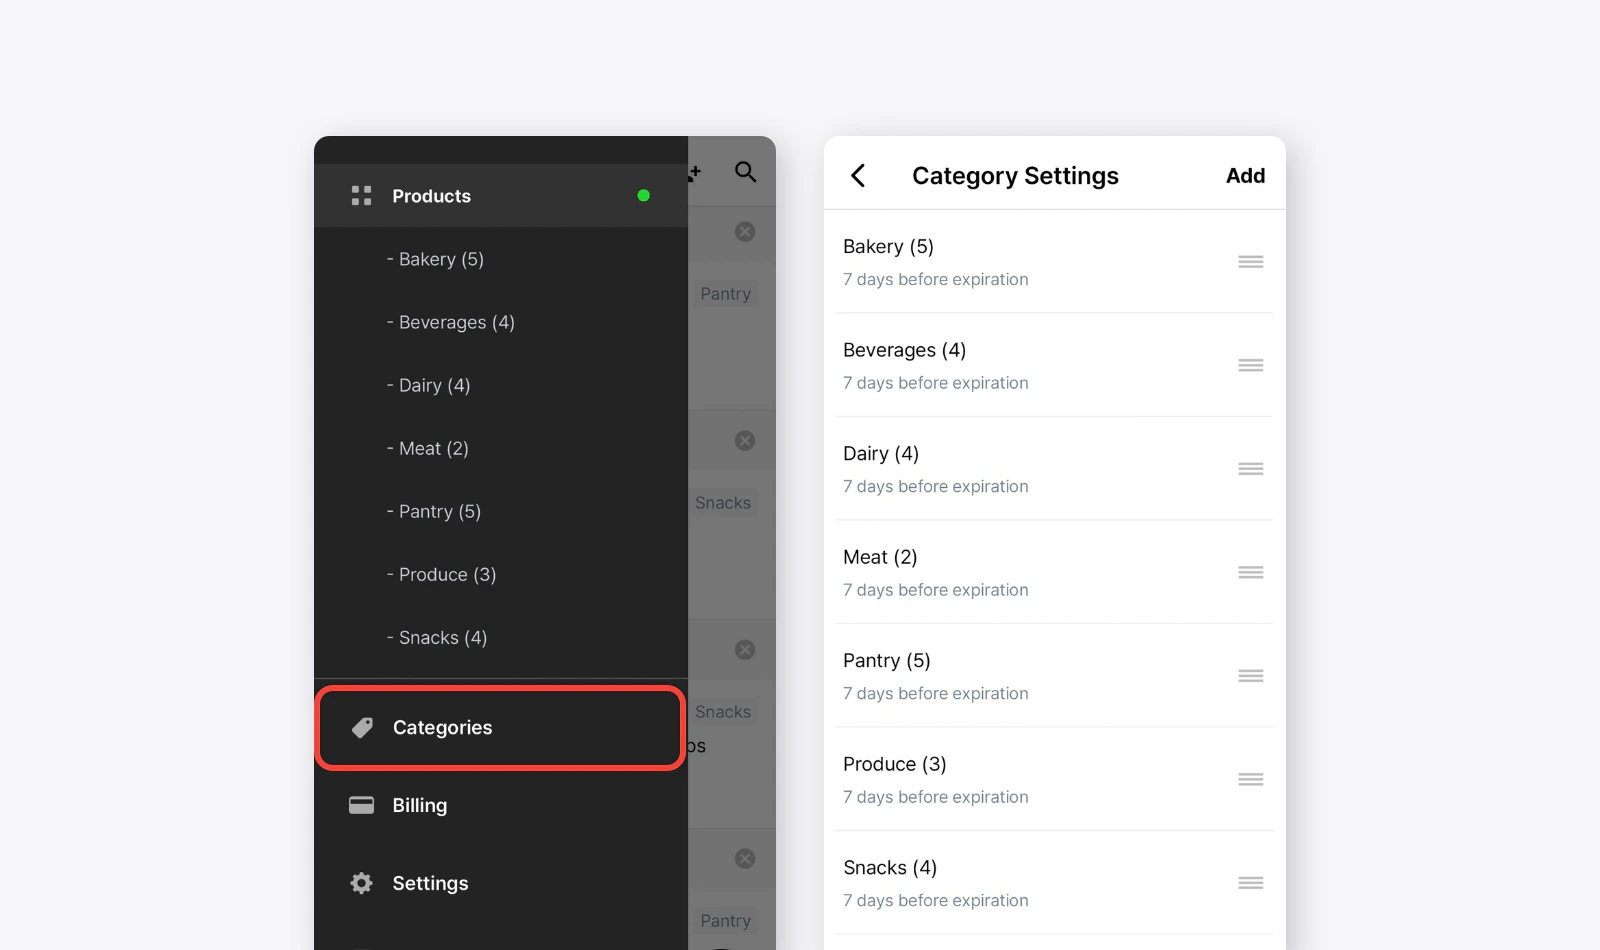
Managing Categories
- Add Category: Tap the “Add” button (top right) and enter a name.
- Edit Category: Drag to reorder or select a category to rename or update the notification date.
- Delete Category: Tap a category to delete it.
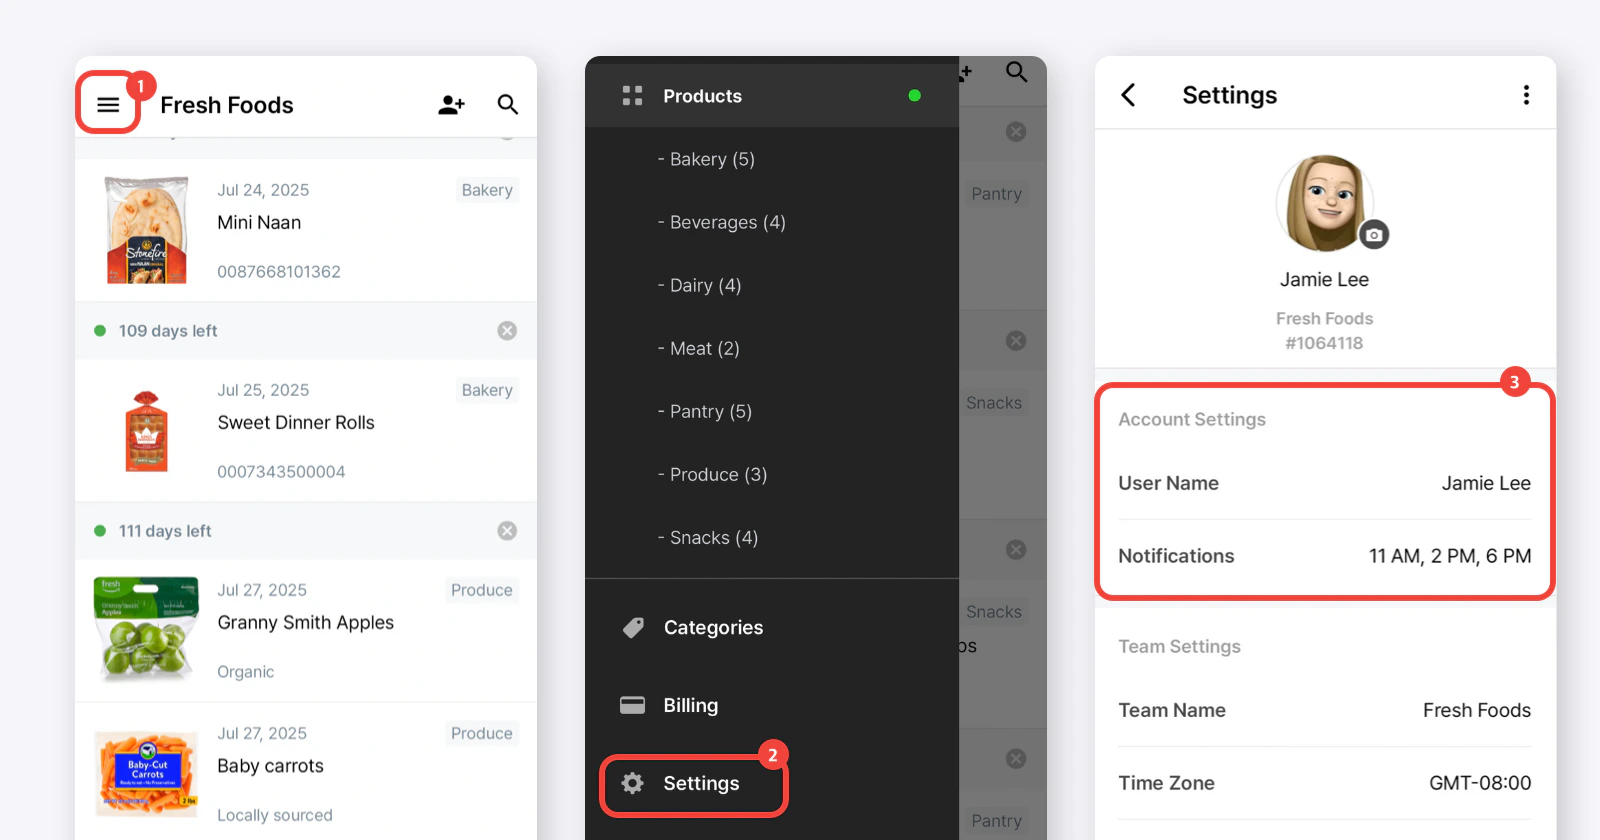
Account Settings
Your profile (name and picture) will automatically pull from your login account. You can modify these details if needed.How to Access Account Settings
Go toMain Menu (≡) > Settings > Account Settings.
- User Name
- Notifications: Enable or disable expiration alerts for your account.
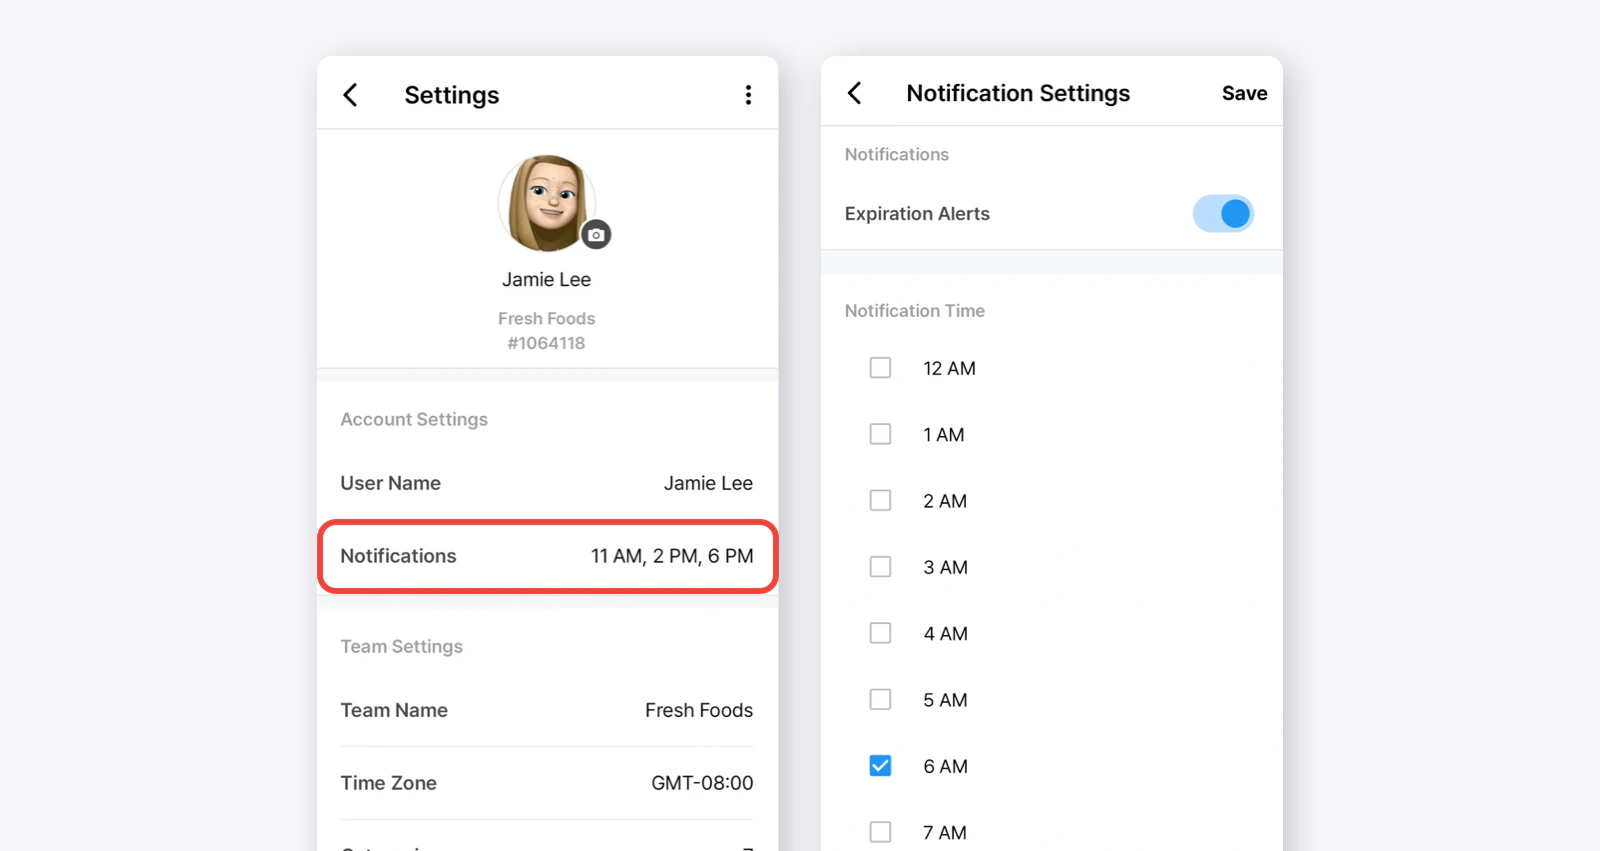
Notification Settings
Manage your notification preferences for expiration alerts and set the times you want to receive them.How to Access Notification Settings
Go toMain Menu (≡) > Settings > Account Settings > Notifications.
- Notifications: Enable or disable expiration alerts using the [on/off toggle].
- Notification Time: Select the times (e.g., 9 AM, 6 PM) you’d like to receive expiration alerts. These times will be based on your team’s time zone.
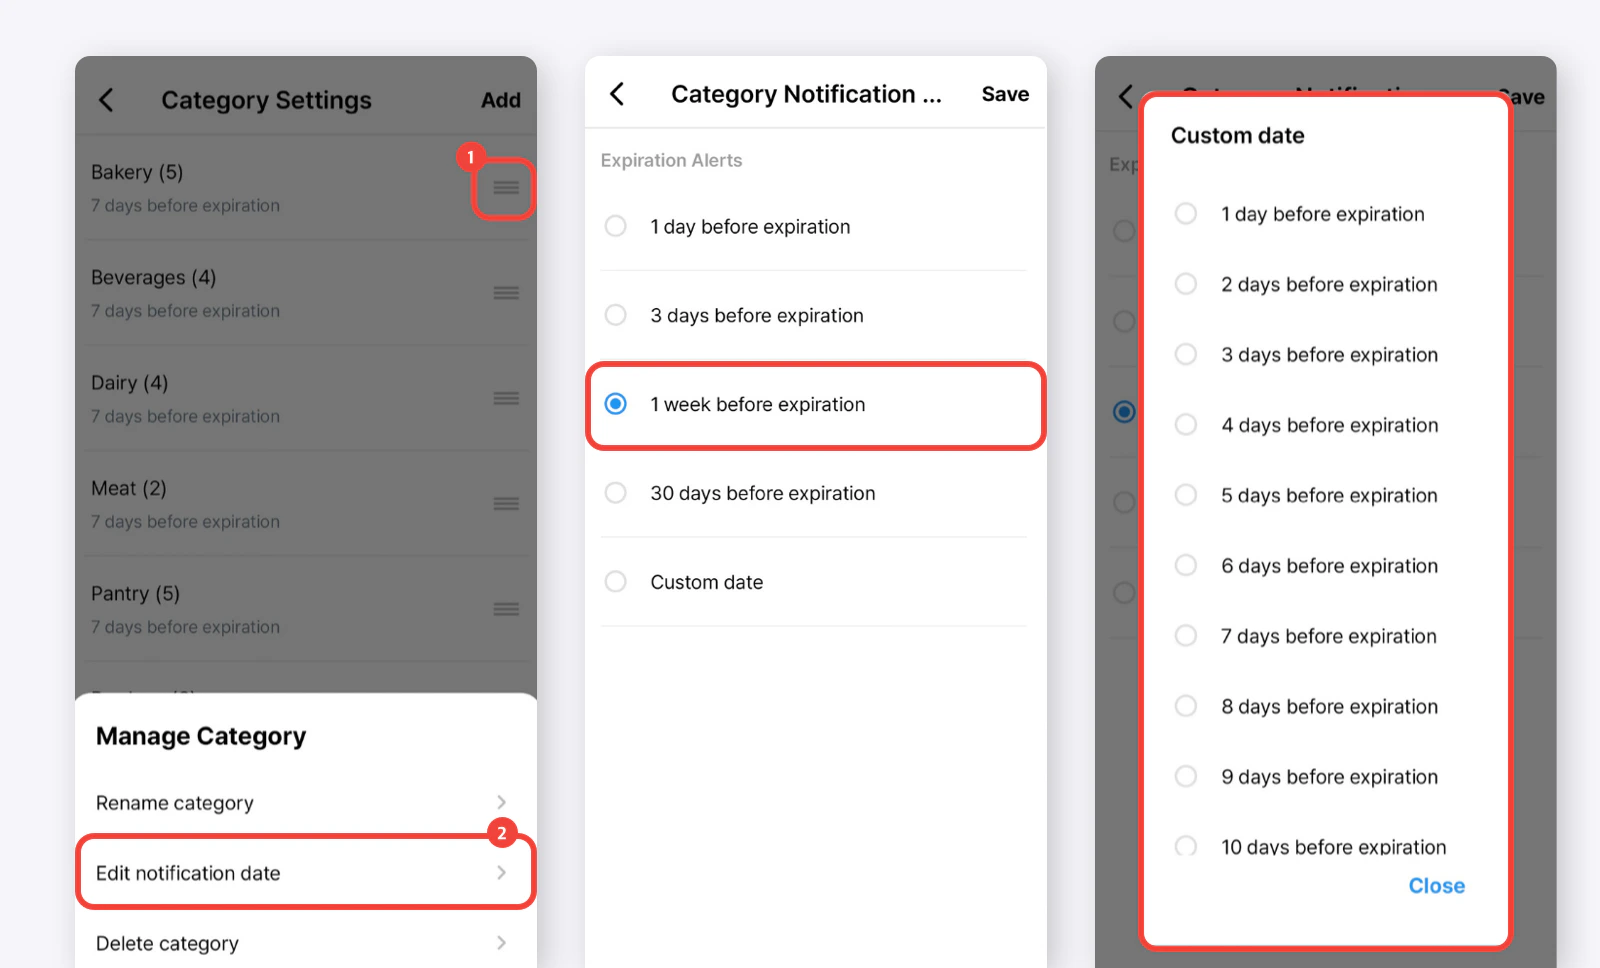
Category Notification Settings
You can customize your notification dates for expiration alerts up to 365 days in advance, and set specific notifications by category.How to Access Category Notification Settings
- Go to
Main Menu (≡)>Categories.
- Go to
Settings>Team Settings>Categories.
How to Update Category Notifications
- Tap the category you want to adjust.
- In the pop-up, tap “Edit notification date”.
- On the next screen (Category Notification Settings), select your preferred expiration alert settings for that category.
- 1 day before expiration
- 1 week before expiration
- 30 days before expiration
- Custom date
Member Settings
Manage your team’s members and roles, and invite new team members to collaborate on BEEP.How to Access Member Settings
Go toMain Menu (≡) > Settings > Members > Member Settings.
- Invite Team Members
- Manage Member Roles

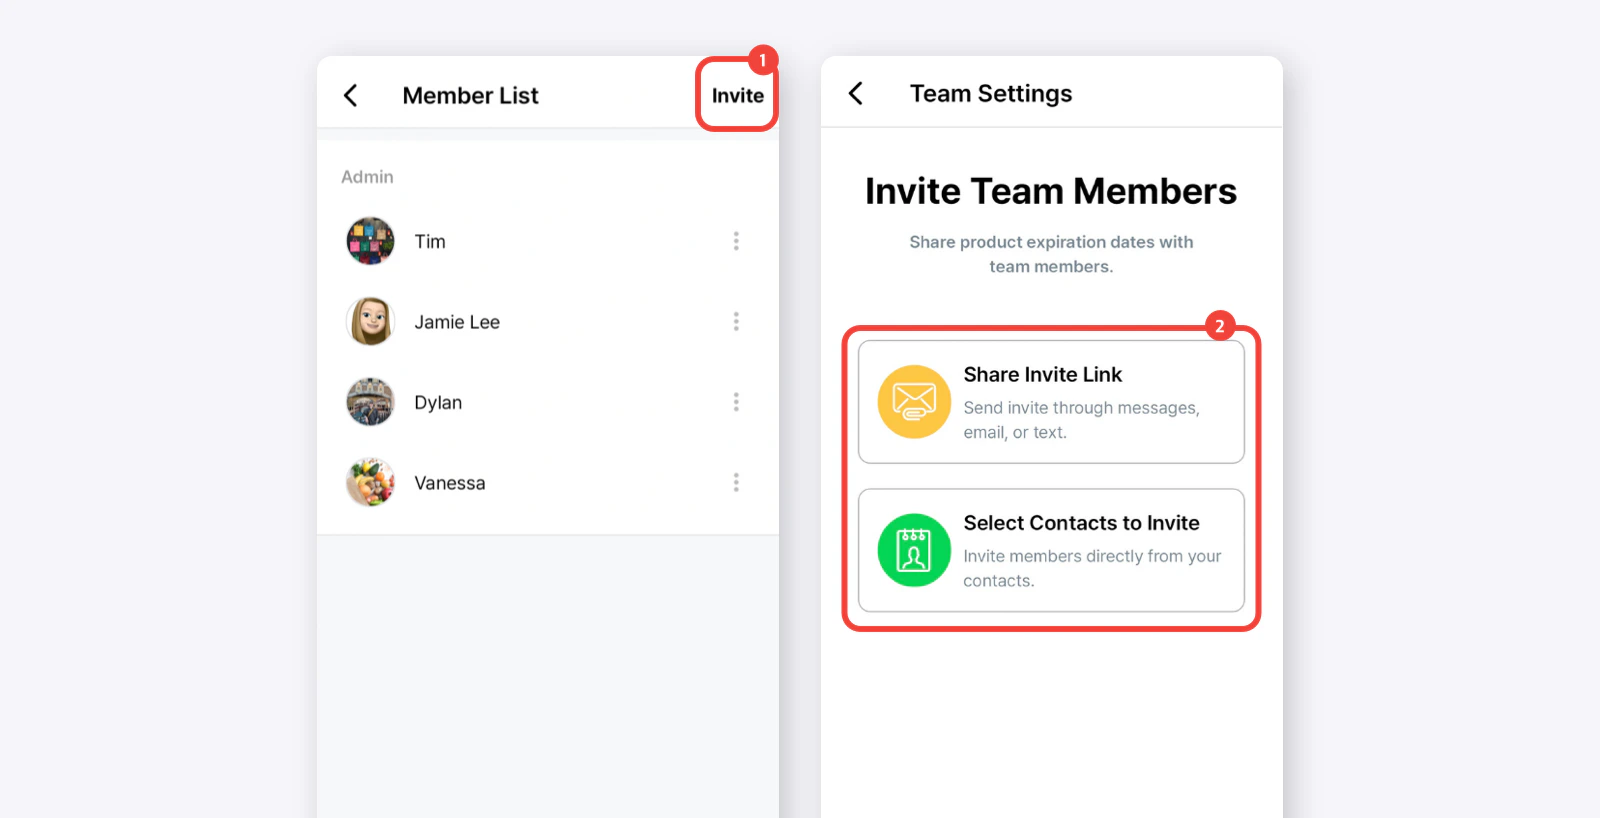
Invite Team Members
- Tap the “Invite” button (top right).
- Choose one of the following methods to invite team members:
- Share an invite link via email, text, or messaging apps.
- Select contacts directly from your contacts list.
Manage Member Roles
The first member of the team is automatically assigned as the Administrator. You can assign the following roles:- Admin: Can manage team settings, invite or remove members, and configure key features such as expiration alerts and notification settings. They have full access to modify product details and categories.
- Member: Can add, edit, and manage products and categories based on the team’s access settings. Members can update product details and track expiration dates, but they do not have full administrative control.
- Limited Member: Can add product details and receive expiration alerts but cannot modify or delete them. This role also does not have access to manage categories and team settings.
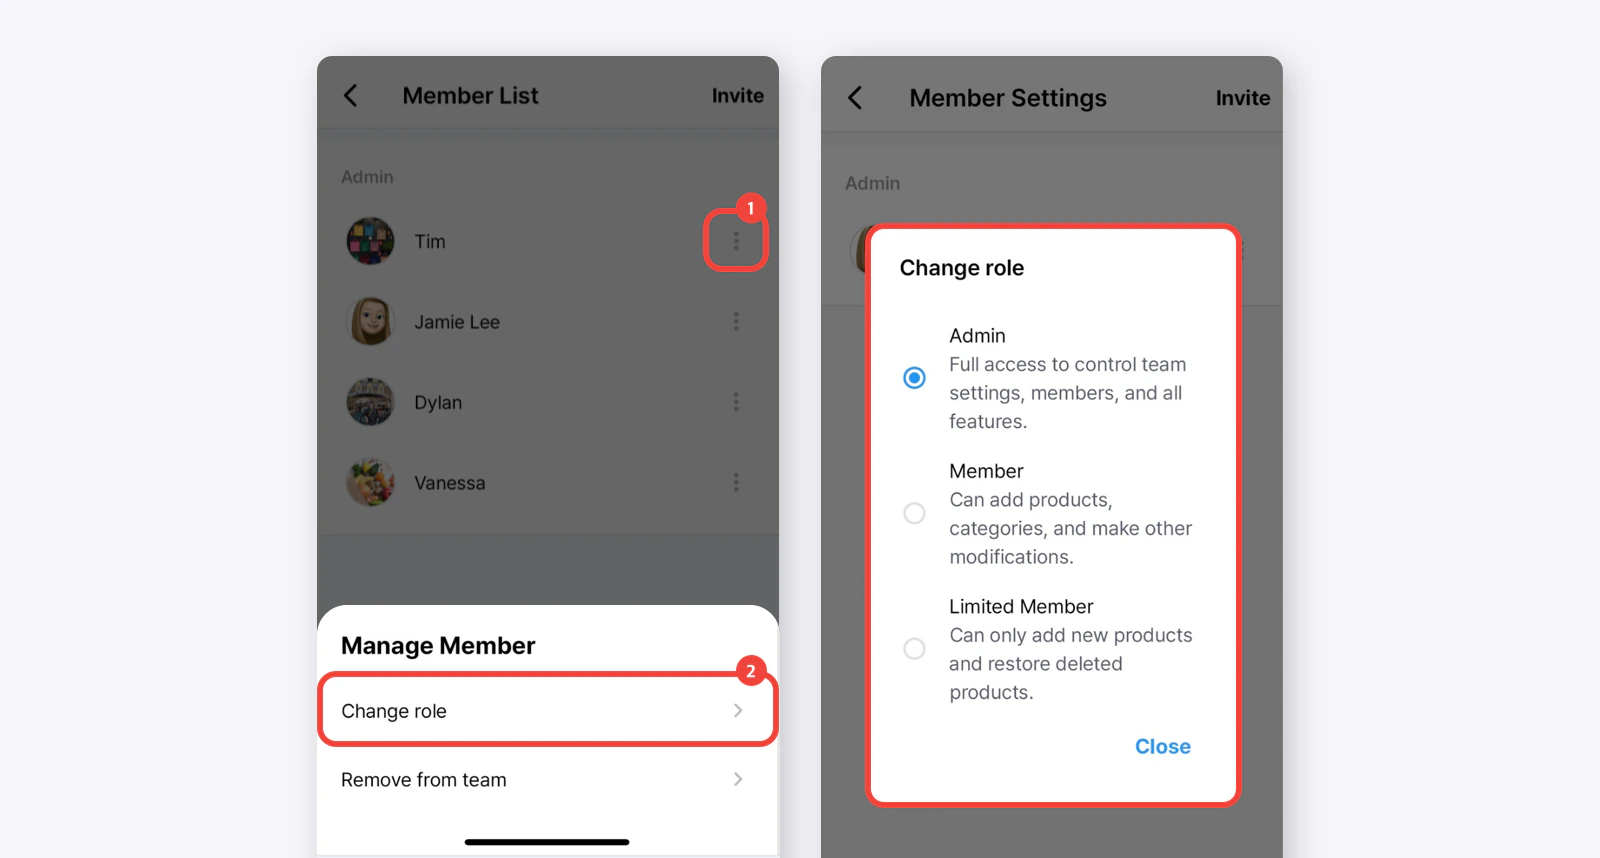
You can update a user’s role at any time to adjust their permissions.